第4章. 对 ParticleSystem 执行长时间的 Simulate 会产生巨大尖峰
4.1. 前言
Unity 的 ParticleSystem 提供了 ParticleSystem.Simulate,可以将粒子的模拟时间控制到任意时刻。但是,如果给 ParticleSystem.Simulate 指定较大的秒数,在某些情况下开始模拟时会产生很大的尖峰。本文介绍其具体案例和注意事项。
4.2. 什么是 ParticleSystem.Simulate?
ParticleSystem.Simulate 的官方文档*1使用 ParticleSystem.Simulate,可以将粒子效果模拟到第 1 个参数指定的时刻,并从该时刻起重新播放粒子。
清单 4.1: 从 0 秒时刻重新播放
1 | ParticleSystem.Simulate(0f, false, true); |
像清单 4.1这样指定 0 秒,就可以实现将播放到一半的粒子从头重新播放的机制。
清单 4.2: 从 5 秒时刻重新播放
1 | ParticleSystem.Simulate(5f, false, true); |
像清单 4.2这样指定 5 秒,就可以实现将正在播放的粒子从 5 秒时刻重新播放的机制。
4.3. 有问题的使用方式
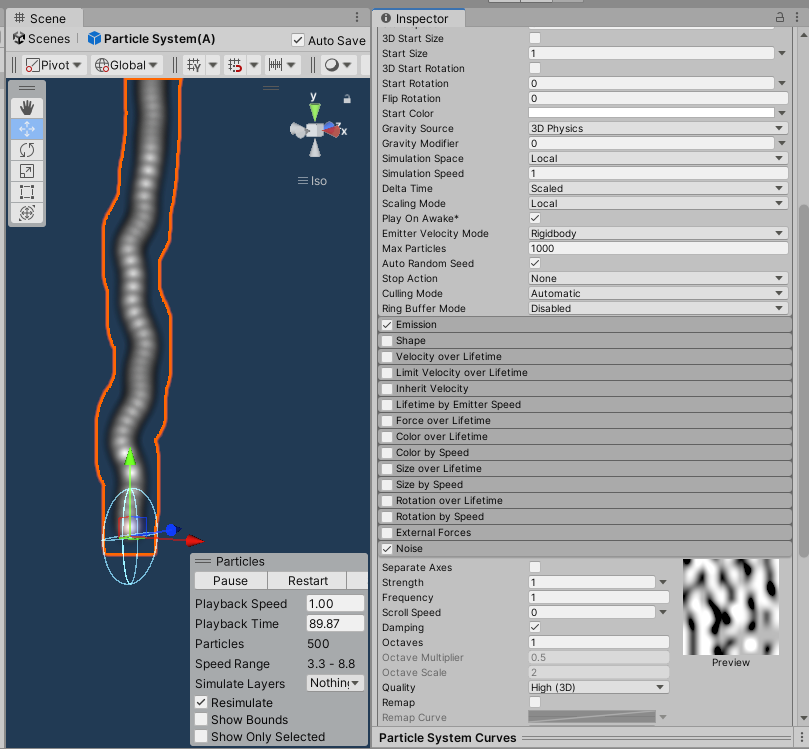
图 4.1: 有问题的粒子
在 Unity 默认创建的粒子基础上,额外开启 Noise 模块。其他调整过的参数只有 Emission 模块:为了便于观察粒子,将其发射调整为排成一条直线。
清单 4.3: 从 20 秒时刻重新播放
1 | ParticleSystem.Simulate(20f, false, false); |
对于这种使用了 Noise 模块的粒子,如果像清单 4.3这样在第 1 个参数中指定过大的秒数进行模拟,处理过程中就会产生很大的尖峰。
清单 4.4: 模拟开销的测量
1 2 3 4 5 6 7 8 9 10 11 12 13 14 15 16 17 18 19 20 21 22 23 24 25 26 27 28 29 30 31 32 33 | void OnClickA() { // 如果有正在播放的粒子则销毁 if (_activeParticle != null) { Destroy(_activeParticle); _activeParticle = null; } // 新建并播放 _activeParticle = Instantiate(particlePrefab, Vector3.zero, Quaternion.identity); var ps = _activeParticle.GetComponent<ParticleSystem>(); if (ps != null) { ps.Play(); } } void OnClickB() { if (_activeParticle == null) return; var ps = _activeParticle.GetComponent<ParticleSystem>(); if (ps != null) { Profiler.BeginSample("再シミュレーション"); // 重新模拟 ps.Simulate(20f, false, false); Profiler.EndSample(); ps.Play(); } } |
用 Profiler 确认开销有多大。这段代码通过 ButtonA 生成所创建的粒子,通过 ButtonB 对粒子进行模拟。为了在 Unity 的 Profiler 中查看时更容易判断问题是否出在 ParticleSystem.Simulate,用 Profiler.BeginSample、Profiler.EndSample 将其包起来,便于排查。
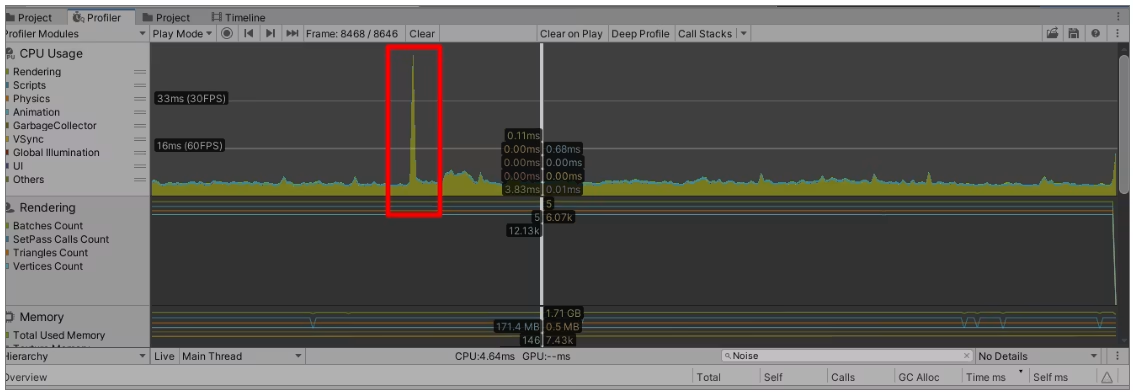
图 4.2: 尖峰产生时的情形
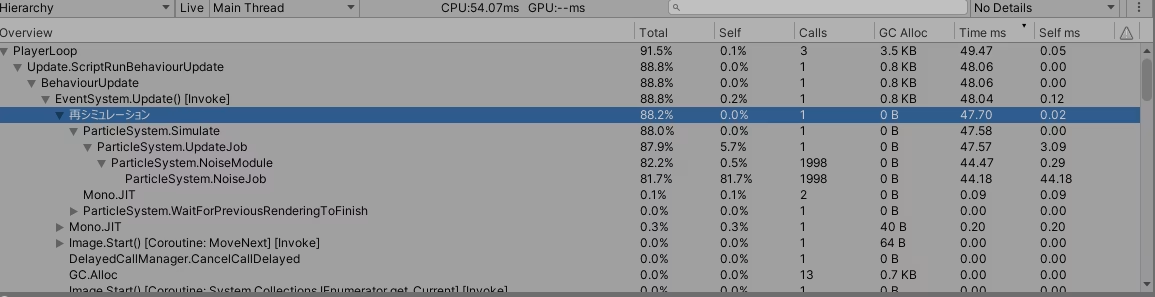
图 4.3: 处理时间
如上所示,调用 ParticleSystem.Simulate 时,ParticleSystem 的 Noise 模块中 NoiseJob 被调用了约 2000 次,由此产生了约 50ms 的尖峰。通过降低 ParticleSystem 的 Max Particles,可以稍微减少这个调用次数。
4.4. 结语
当需要使用 ParticleSystem.Simulate 来实现从任意秒数开始发射粒子的机制时,
- 是否存在指定较长时间、从中途开始发射粒子的场合?
- 是否使用了 Noise 模块?
请确认以上两点;尤其是使用启用了 Noise 模块的粒子时,最好避免使用 ParticleSystem.Simulate。